
GPS Watch Navigation – Making Use Of This Handy Feature
Staying on Track
GPS watch navigation is a very handy feature available on a lot of the GPS watches out there now. It can seem like a complex feature to use initially, but once you get the hang of it there’s no looking back.
In this post I explain how to upload a route to use on your GPS watch and also how to build a route on the Strava and Suunto Apps. This can be used in navigation when you’re out on the trail – a handy feature for racing and for exploring.
Since making the move from competitive triathlon to trail running, I have quickly learned that you need to be attentive when racing around marked trail routes. Even though they are marked it can be easy to miss a turn or marker showing a change of direction when you are travelling at speed, checking your watch, or concentrating on good foot placement.
So after going the wrong way in two of my recent races, I decided it’s time to lessen my chances of this happening again.
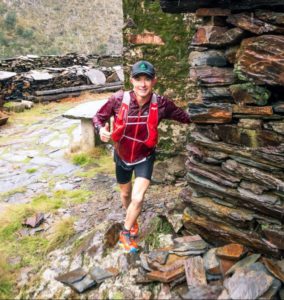
Uploading the course GPX file
To utilise GPS watch navigation you first have to have the route available on your watch. When the course GPX file is available on the race website it is important to upload this to your phone and then onto your watch you will be racing with. This will give you an on hand guide to navigate you around the course, along with the visual course markers. It can act as a secondary check to the markers if at anytime you maybe unsure if you are still on the correct course.
Lessons Learned
The first time I went the wrong way in a trail race, there were tourists walking the trail and were standing between the marker to turn, and me, blocking my vision. If I had the course uploaded in my watch, it would have alerted me when I was about 100 metres off course. I did not have it uploaded and therefore ran just over a kilometre and then turned back to look where I had gone wrong. This put me from 2nd position back to 10th.
The second time it happened in another race I missed a marker that notified me to turn right (no tourists this time, just my fault). The problem was I had no idea that I was going the wrong way, as the markers kept telling me I was on a course, (just not the 35km course that I was competing in). I was leading the race at this point.
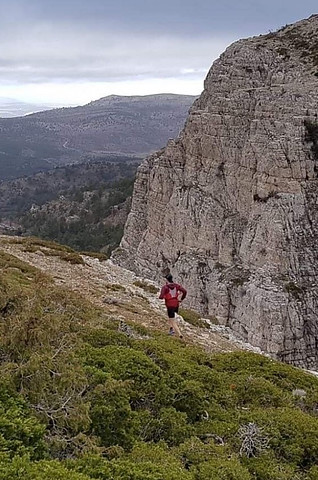
I went on until I got to an aid station that I knew was about 7km from the finish and realised I had only run 23km at this point meaning the course was short or I had missed about 5km of the course.
I continued on being a bit confused and later got stopped by an official to say that I had missed a part of the course. Being very disappointed about being disqualified I was determined to get better at navigating around these courses.
Handy Feature
GPS watch navigation shows up as a map displayed on my watch. This is a breadcrumb map which basically shows you dots with where you have come from and a blue arrowed line to where you are heading. It is fairly basic but when you practice with it and get used to it, it is quite effective.
The watch will alert you with beeps when you have run about 50-100 metres off course. This is a good feature as there is no need to be staring at your watch all the way around the course. Once you have back tracked it will then alert you when you are back on course.
Training To Be Good at Navigating From Your Watch.
To get good at navigating with the use of your watch will take a little bit of practice, but it is definitely worth it. After creating some training runs around my area on the Suunto App’s map feature, they were automatically uploaded to my watch and were ready to navigate from.
After less than a week of doing some GPS watch navigation runs (that I didn’t exactly know where I was going because I had not been on before), I was getting quite good at it. The more I used it the better I got to know this feature and hence the more I trusted it.
Strava 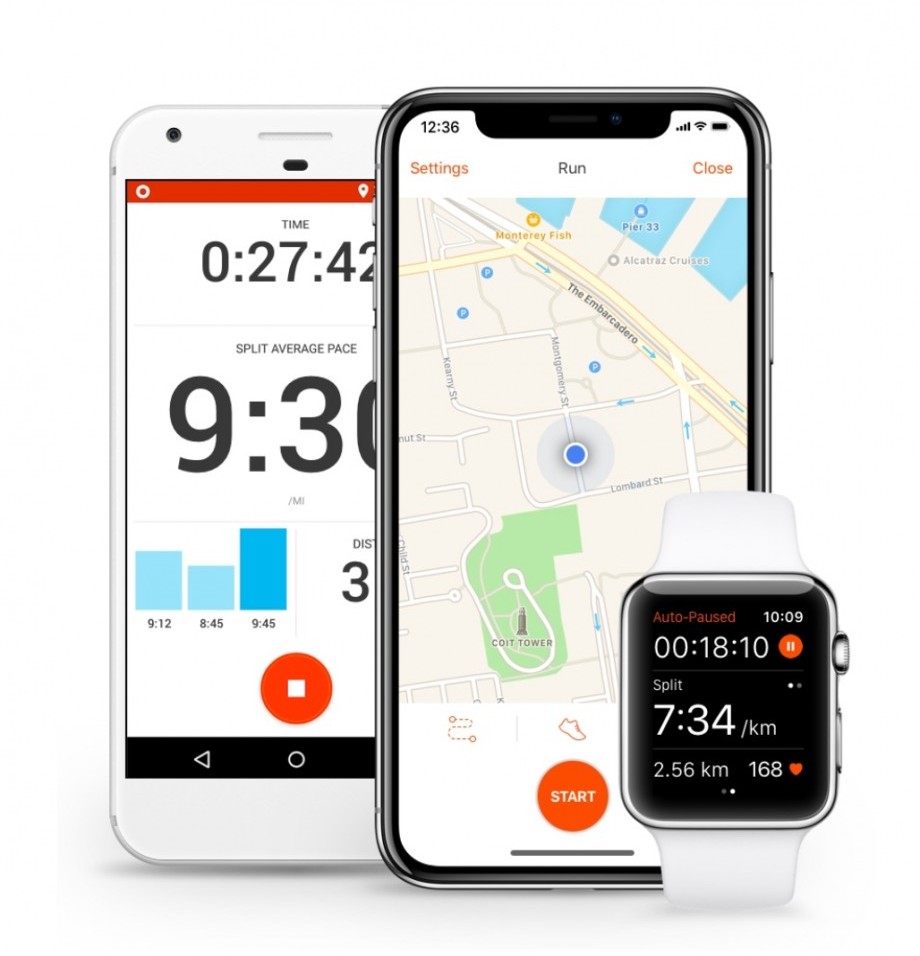
The mapping feature is also available on Strava through “Route Builder”. Once you have completed a run on Route Builder it can then be uploaded to your watch so you can navigate your way around the course.
Not only is this good for using in competition to stay on course, but it is also a really great way to explore new trails without the worry of getting lost or going way too far, which most of us have done at some stage. This also makes it a great safety feature.
When you create these runs it will automatically show you the total distance and elevation gain, so you know basically what you are in for before taking off on your run, (no surprises).
Getting Started Mapping Out New Runs
If you are going through Strava it can be done through the mobile app, but I prefer going through the strava website on your laptop or desktop computer.
Mobile App
Obviously you will need an existing account or you will need to create one. I will not go through setting up a new account here as there are a lot of other guides on setting up a Strava accounts on the net.
-Firstly go to your “Profile” page on your app, then scroll right down to the bottom and touch on” Routes”.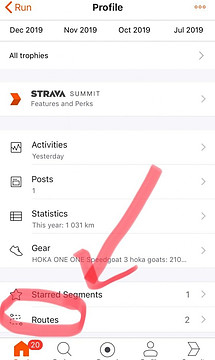
-Your Routes page will come up, then touch on the addition or plus sign in top right corner of screen.
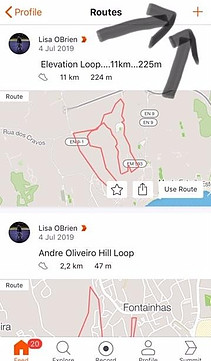
-A map will appear of your current location, or if you want another location you can either swipe over to it on the map or type it in the space at the bottom and it will take you there.
-You can zoom in and out by widening or narrowing the space between your index finger and thumb while they are touching the screen.
-Press on the pencil icon then touch on map where you want to start the course.
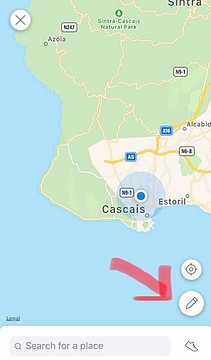
-If you want to delete a section you have done at anytime, touch the part circle with the arrow on the end to undo what you have just done, or keep pressing until you go back to where you are happy with.
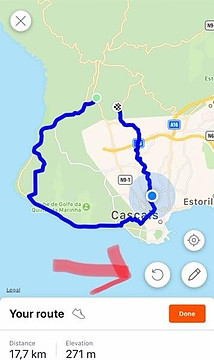
-When marking out the course do it bit by bit until you get the hang of it.
-Each time you want to draw another section touch the pencil again.
-Keep going until you reach the area where you want to finish, which is generally back at the start point but doesn’t have to be.
-Then tap on “Done”
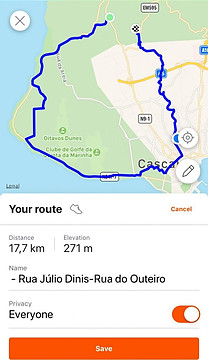
-It will show you the total distance along with the elevation.
-Name the route, then tap “Save”.
Desktop or Laptop
This is my preferred way, as I find it easier and less fiddly.
-Log into your Strava page.
-Click on the down arrow beside your profile picture and you will get a drop down.
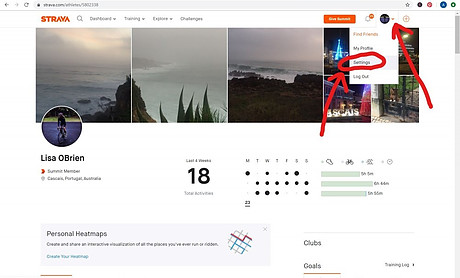
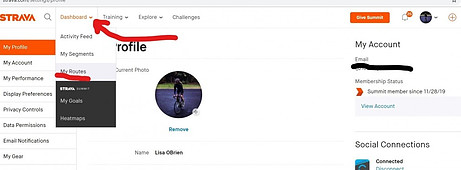
-Click on Settings, then move over to left top corner, hover over Dashboard and then drop down and click on “My Routes”
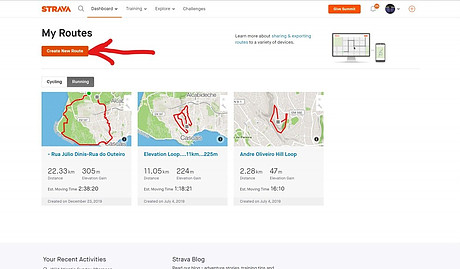
-Click on “Create New Route”, this will bring up the map where you create a new route.
-Top left corner you can search for another area.
-Across to the right click on run, then down the bottom you can opt for elevation to be on or off. I like it on to see a side profile of the ascents and descents.
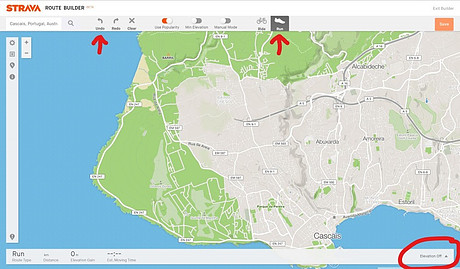
-Plus and minus sign to zoom in or out on map is in top left corner and to move map across place hand on map with mouse and click to grab/hold and pull across to show a new area of map.
-You are now ready to start drawing.
-Click on where you want to start and then click on the next point and so on to create a course.
-To change a section click on undo and it will take you back a stage at a time until you are ready to proceed drawing again.
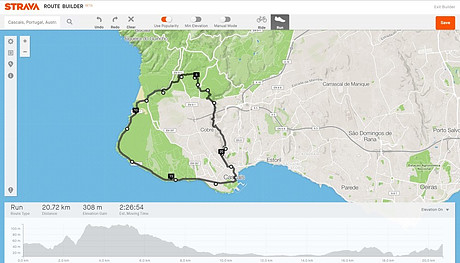
-When finished click “Save” and name you new course. Then save and view.
You can share this with your friends or the community or keep it private for yourself.
Related post: Best Trail Running Watches – My Top Five Picks
How to Sync Strava Routes to IQ Capable Garmin Devices
Check compatible devices online, but as far as I’m aware these models and newer are compatible:
Fenix 5
Forerunner 230
Forerunner 645
Forerunner 735
Forerunner 935
(There maybe others, you would need to check on you personal model)
Firstly Install the ConnectIQ App
-Download the Strava Routes Garmin ConnectIQ app from the ConnectIQ Store
Importing Strava Routes to your Garmin Device
The next time you sync your Garmin Connect and Strava accounts, all starred and self-created Strava Routes will be listed on your Garmin device and can be downloaded for navigation.
-You can review the Routes that will be listed on your Garmin device on the My Routes page on the web or under your profile on the iOS or Android app.
-The Strava Routes app will appear in the ConnectIQ app folder. Your download routes will appear in the “Courses” folder.
(Make sure your Garmin devices has the latest updates also).
What if I don’t have a ConnectIQ capable device?
If this applies to you, click on the link, HERE and go through the instructions from the Garmin Support website
Suunto App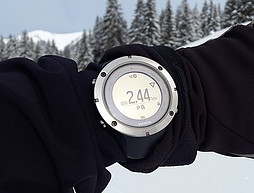
The Suunto App is what I use as I have a Suunto watch and I find the App and mapping very easy to use.
So you obviously need a Suunto account and the App loaded to you smartphone and you would be using a Suunto watch.
-Click on the App and touch on the map icon at the bottom of the screen.
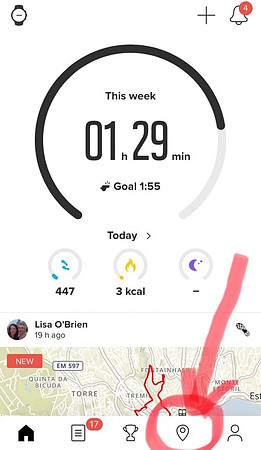
-Tap on the 2nd top right icon which resemble 3 sheets of paper (I think) and then it will bring up the map selection page.
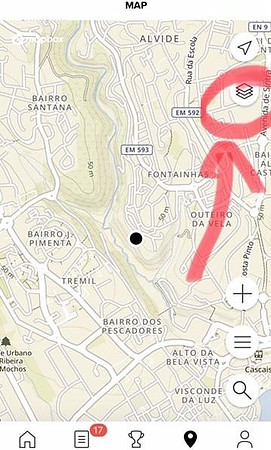
-Depending on if you are trail running or wanting to just stick to the roads and paths, tap on either one and it will show you a heatmap of where other runners have travelled. The brighter the colour the more the trail or road has been used.
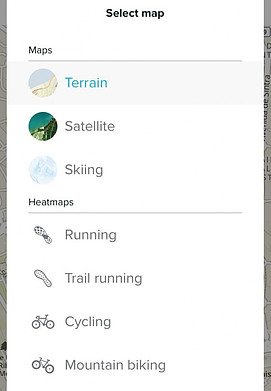
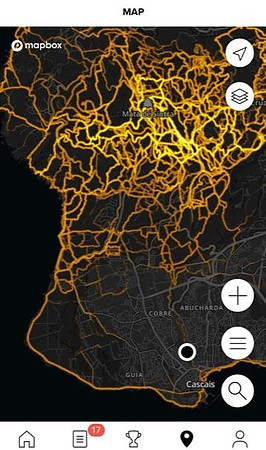
-You can start to draw your route off this map or you can tap on the icon again and select a satellite or terrain image suited to your preference.
-I find the trail running map easier when you are look for new trails, as it lights up all the trails that have been used by other runners. These trails can be sometimes hard to find on the regular terrain map.
-When you have selected your map type, (which you can change as you draw if you like), tap the addition icon and start drawing you route.
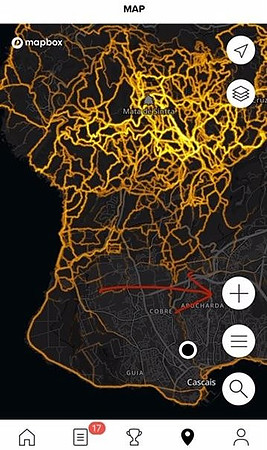
-Tap smallish sections at a time until you get use to it.
-The half circle with an arrow on the end will undo a section if you want to change it.
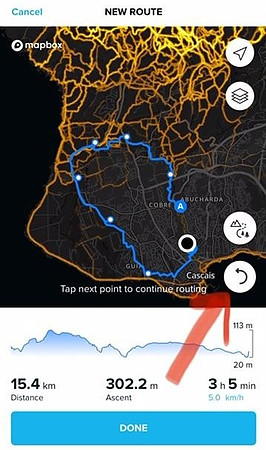
-The 3rd icon on the right side will give you more routing option types. I generally just use the Free Drawing option if when drawing it won’t allow me to go though a section as it does not recognise it as a track.
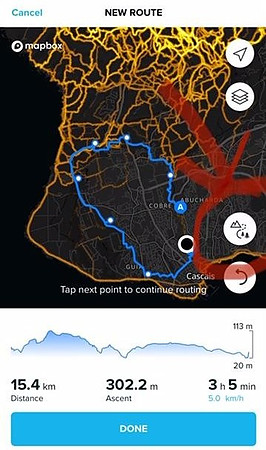
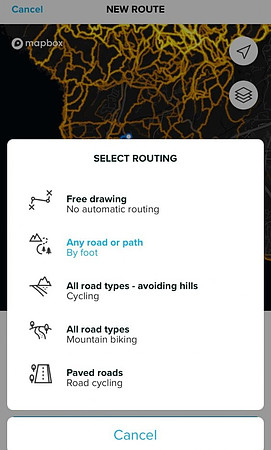
-Tap on “Done” when you reach the end of the route, then name and “Save Route”
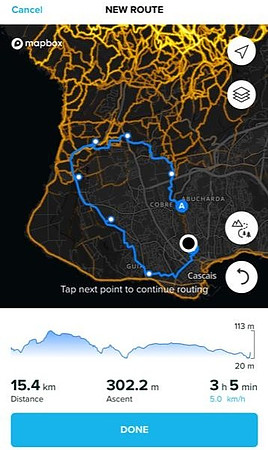
-Finally tap on “Automatic Upload” to watch so it is ready to use and that’s it.
Conclusion
I had the GPS watch navigation feature on my watch for quite some time before I actually used it. Now I have discovered it, I use the feature regularly.
For trail racing I think it is a must, but it is also great in training for discovering new areas and trails. It also keeps things interesting but also safety-wise it’s fantastic, so you don’t wonder too far off track and get lost.
Like I said previously, the more you practice navigating off it the better you get at following the navigation cues.
Give it a try and let me know in the comments below of how it goes or any questions you may have.
It would be great to hear from you.
Happy Running, 
Andrew.
2 thoughts on “GPS Watch Navigation – Making Use Of This Handy Feature”
I found this very helpful as I’m new to GPS watches myself and learning by trial and errors, lots of errors giving me lots of learnings :).
I didn’t know how to create Strava routes beforehand either, so that’s another gem from your article.
Thanks Andrew.
KiwiJohn
Glad you found it helpful John! I know the more I use these features the more comfortable I am with them – it’s actually become quite fun!